Below is a cheap automatic bird feeder you can build in 20–30 minutes from household materials with a few simple tools.
Why winter feeding matters
Winter can be a lean season for small birds: short days, cold nights, and snow or ice can make natural food harder to find. A simple feeder can help birds maintain body temperature and conserve energy—especially during cold snaps.
While we’re helping our feathered friends get through winter, we also get to enjoy watching them. Feeding birds is especially rewarding with children: kids love animals, and it’s a great way for them to learn responsibility in a very practical sense. You can observe the visitors together, look through bird books and pictures, and teach children the names of the local species—so they get to know the nature around them from an early age.
If you begin feeding in winter, aim to keep it going consistently until the weather settles in spring. Birds build dependable food sources into their daily routes, and a sudden stop during harsh conditions can force them to spend extra energy searching elsewhere.
The winter bird-feeding season typically runs from early December to the second half of March. In spring, when chicks hatch, it’s best to stop feeding (or switch to breeding‑safe food and very strict hygiene). Many common feeder foods are unsuitable for nestlings. Nestlings cannot digest seeds properly, so feeding them seeds can be fatal. They need moist, high‑protein prey rather than dry seeds; large pieces can also pose a choking risk. Warmer temperatures further increase the chance of food spoilage and disease spread at feeders. Feeding nestlings is a science in its own right—if you want what’s best for them, leave it to their parents and don’t experiment with it yourself!
Because this DIY feeder is designed mainly for seeds, plan to phase it out as the nesting season begins.
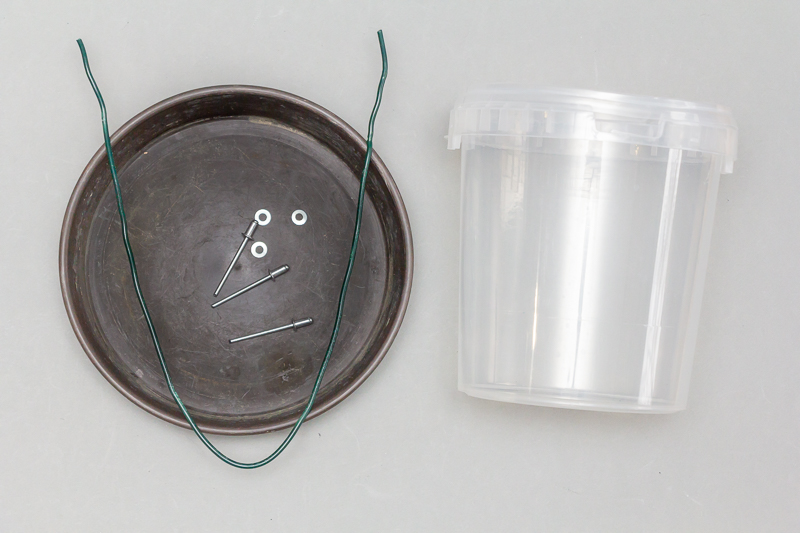
What you’ll need
- 1 plastic container with a lid (e.g., the kind used for ice cream or sour cream)
- 1 saucer (worn plant pot tray)
- 3 pop rivets (or M3 bolts with nuts) + 3 washers
- approx. 0.5 m of medium‑stiff steel wire (e.g., leftover ∅1.6 mm fence wire)
- an S‑hook for hanging (e.g., bent from ~0.5 m of ∅2.7 mm galvanized tension wire)
Build steps
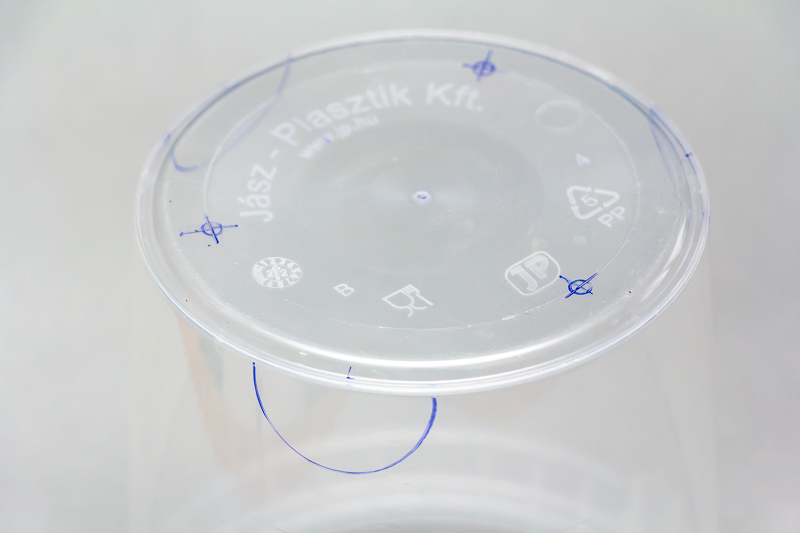
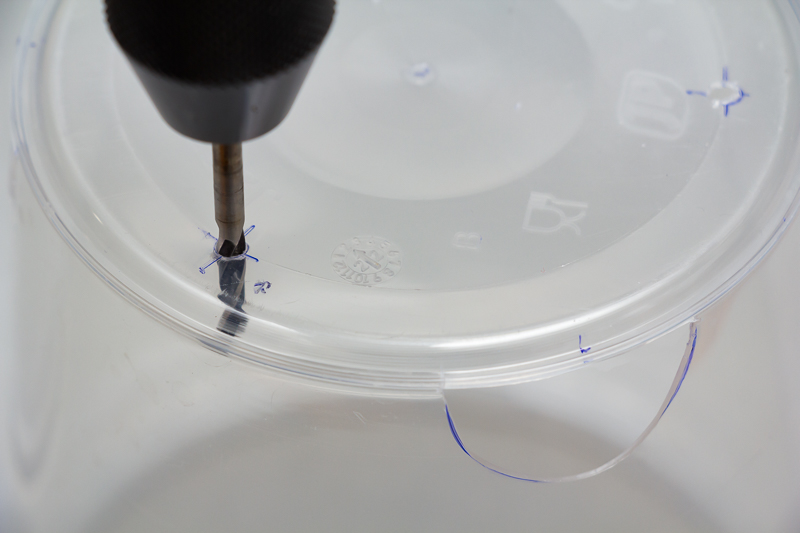
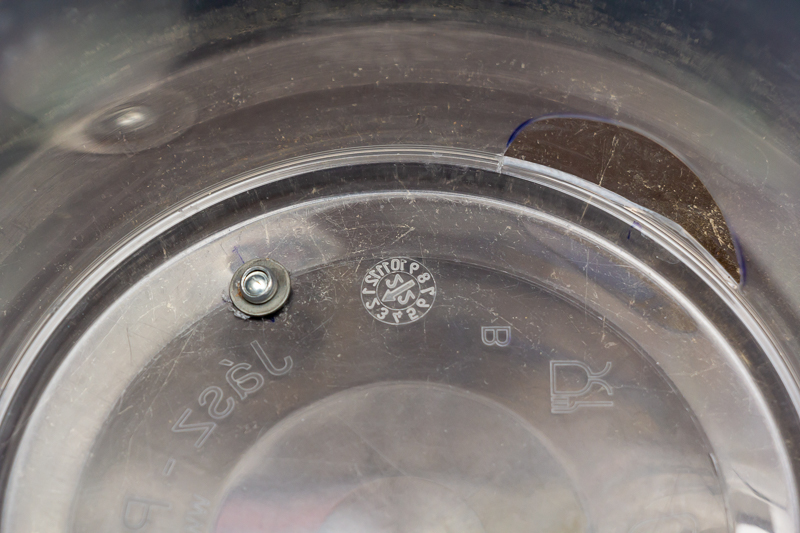
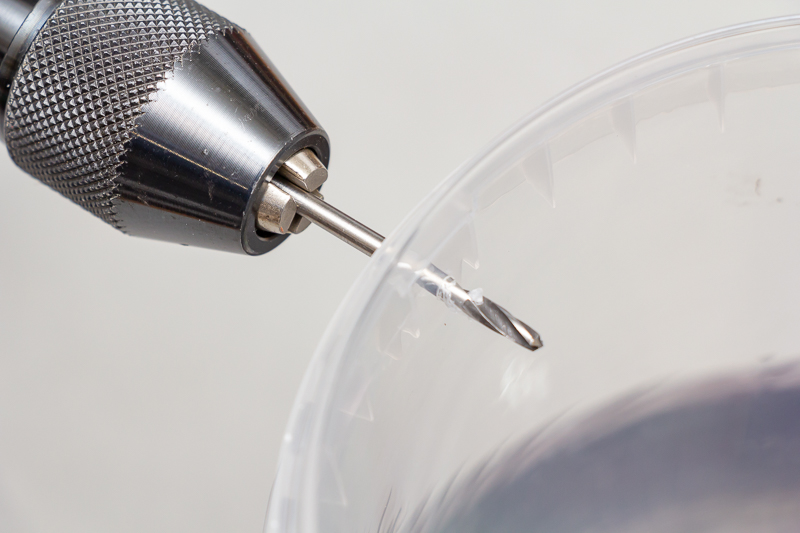
1) On the bottom of the container, mark the positions of the mounting holes 120° apart—these will be used to fasten the saucer (flowerpot tray). Relative to these, mark the dispensing openings rotated by 60°: these are ∅35 mm semicircles.
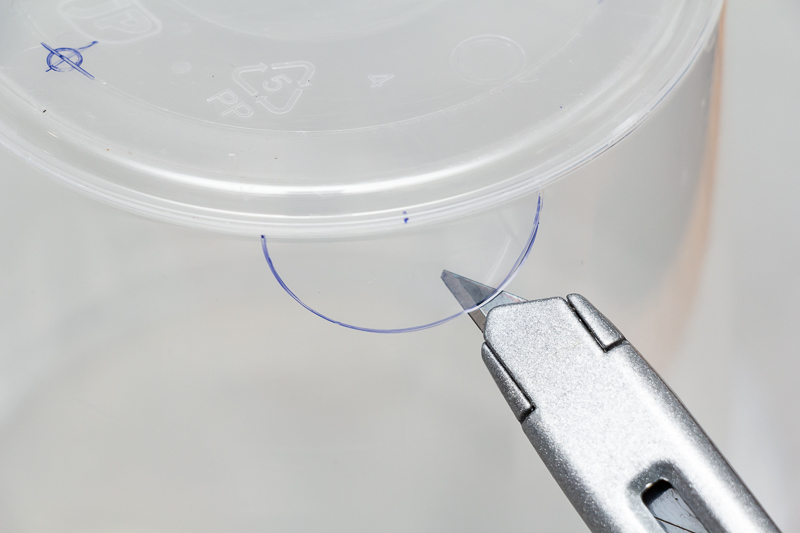
2) Cut out the openings. Be careful—the plastic can split easily.
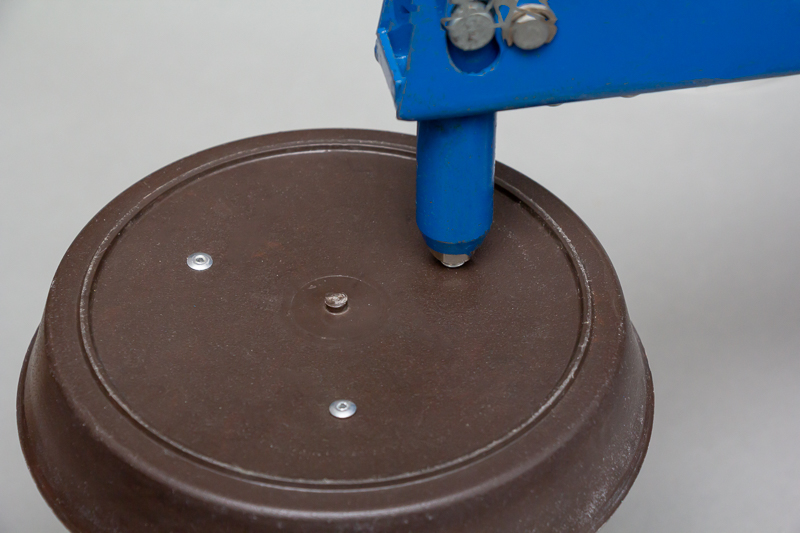
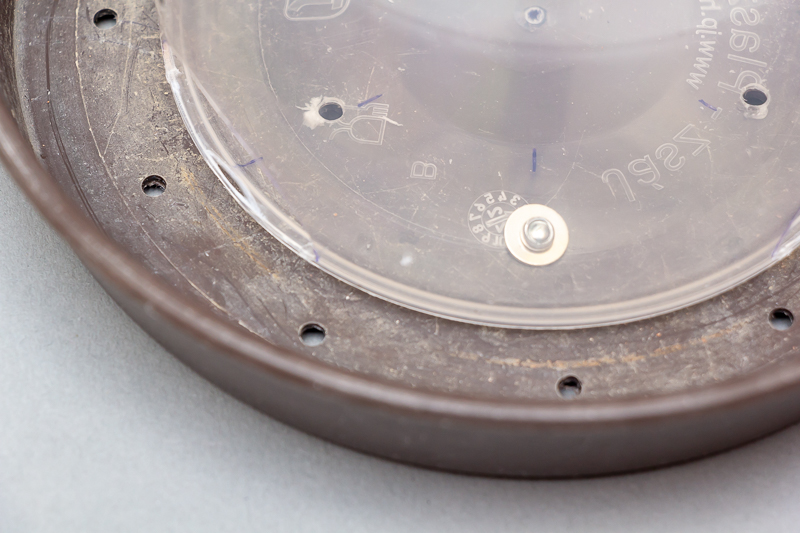
3) Drill the holes. Then transfer the hole positions onto the saucer and drill those holes as well.
4) Fasten the saucer with the pop rivets. On the inside, slip a washer onto each rivet before setting it with the rivet gun. You can also use bolts. If you have neither, drill several smaller holes and tie the two parts together with plastic fishing line. Do not try gluing: polypropylene cannot be reliably glued.
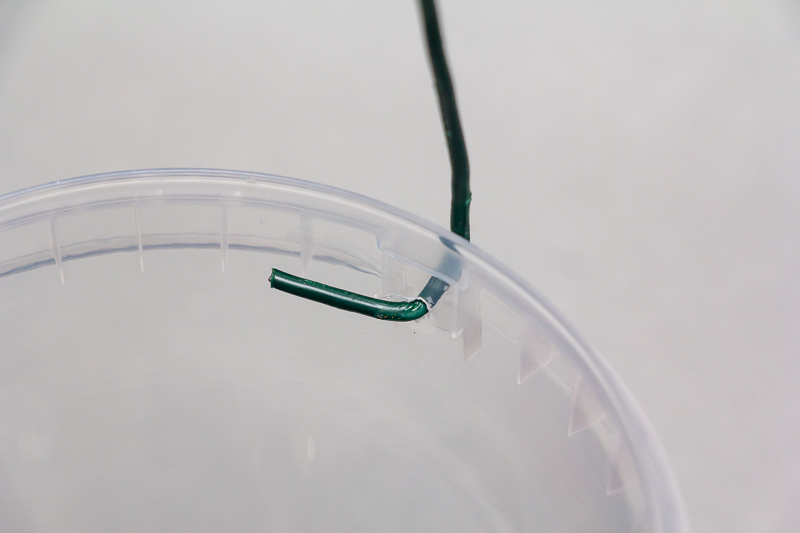
5) Drill the hole for the support loop and secure the hanging wire by bending the ends.
6) I realized afterwards that it’s a good idea to drill several small drainage holes in the bottom so rainwater can run out.
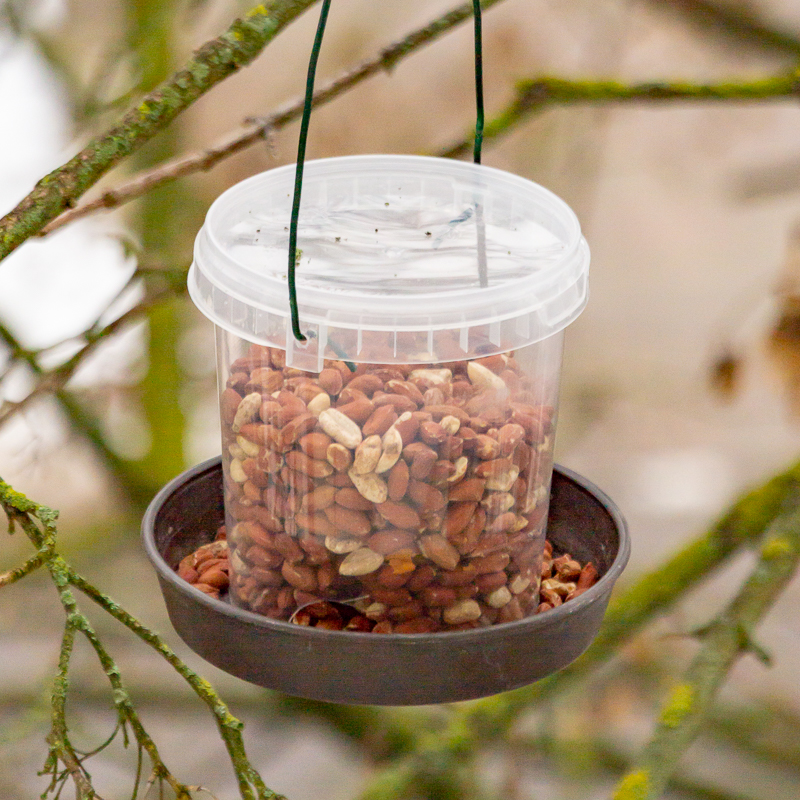
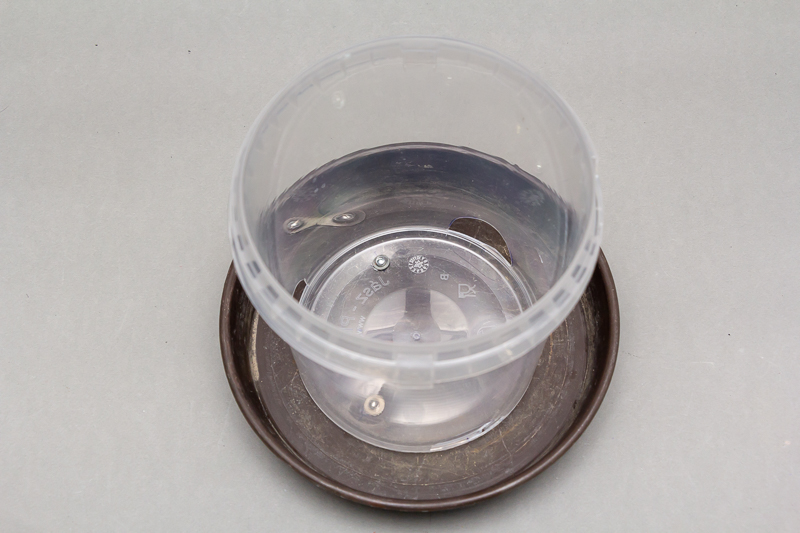
The finished feeder
Here is the completed feeder:
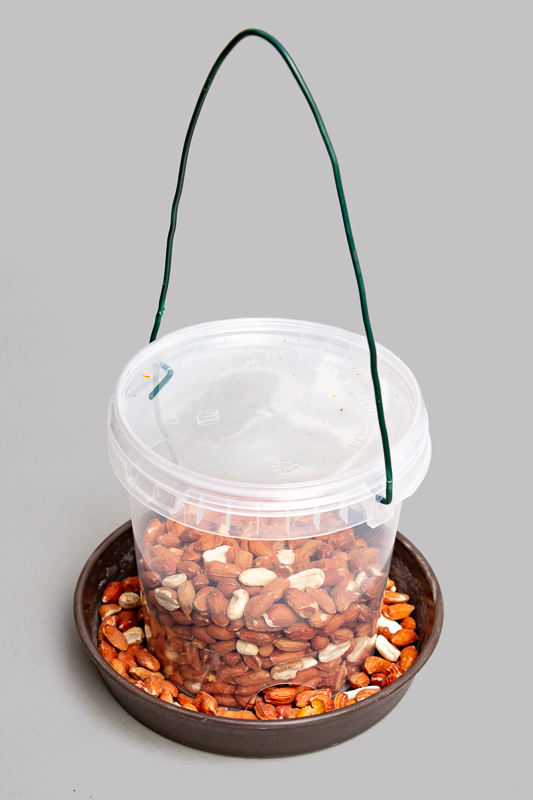
Hang the feeder from a tree branch using the S‑hook bent from thicker wire:

What seeds to use
The cheapest option is to fill the feeder with black oil sunflower seed (or sunflower hearts/chips if you want less mess): it’s energy-dense and attracts a wide range of common garden birds.
You can also use a quality mixed-seed blend, but avoid mixes packed with cheap “filler” grains that many birds ignore; if you notice lots of leftovers under the feeder, switch brands or increase the sunflower proportion.
Keep all seed dry, fresh, and unsalted, and never put out moldy food—it can make birds seriously ill.
Important (especially with kids): Some foods that children love are dangerous for birds. Never put bread or bread crumbs in the feeder, and avoid chips/crisps and popcorn. Bread offers poor nutrition and, when it gets wet, it can swell and ferment in a bird’s crop, causing serious digestive problems that may be fatal. Spoiled, moldy, or salted foods are also unsuitable for feeding birds.
Because this design dispenses seed through relatively large openings, stick to medium-sized seeds (sunflower, sunflower chips, small walnut kernels) that flow well without spilling too fast.
If you want to use smaller seeds—for example, millet (spray millet) or nyjer (thistle seed)—make the dispensing openings smaller so the seed doesn’t spill out too quickly.
If hazelnuts are all you have on hand, you can use them—many birds enjoy nuts—but do it safely: use only unsalted, unflavoured nuts (e.g., peanuts/groundnuts or hazelnuts). Make sure they are fresh and completely dry (never moldy), and, if needed, chop or crush them into smaller pieces so they don’t jam the openings and are easier for small birds to handle. Nuts are high-energy but can also attract squirrels, so consider placement accordingly.t.
Where to place the feeder
Good placement makes the feeder safer for birds and easier for you to maintain.
- Pick a calm, visible spot. Birds prefer a feeder they can approach with a clear view of danger.
- Provide cover—but not an ambush point. A tree or shrub nearby helps birds retreat quickly, but avoid hanging the feeder right beside dense foliage where cats can hide. A practical rule is to keep it about 1–2 m away from thick cover.
- Keep it out of reach of predators. Hang it at least 1.5–2.5 m high and away from surfaces a cat can jump from. If cats are common, choose an open location with minimal hiding places.
- Reduce window strikes. Place the feeder very close to a window (within ~1 m) or well away (often >10 m). The “in‑between” zone tends to be riskiest.
- Shelter from weather. A spot with partial protection from rain and prevailing wind helps keep seed dry. Avoid placing it under a constant roof dripline.
- Stable hanging. Use a sturdy branch, hook, or pole so the feeder can move slightly in the wind without banging into walls or branches.
- Easy access for refilling and cleaning. You’ll use it more (and keep it safer) if you can reach it comfortably.
- Squirrels (if relevant). Hang it at least ~2 m from jump‑off points and consider a simple baffle on the line or pole.
With a sensible location and regular cleaning, this simple DIY feeder can be a reliable winter food station—then easy to remove again as the nesting season begins.
UPDATE: If you shape a thin sheet of plastic (for example, the cover from an old notebook) into a low cone and place it on the bottom of the container, the seeds will flow out more easily.
You make a cone by cutting a circular sector and then overlapping the straight edges. For a low cone, remove a small wedge (roughly 10–25°), then roll it into a cone and adjust by trimming a bit more if needed.
